Archive | Baking RSS feed for this section

Countdown to Summer! {Fresh Strawberry Cupcakes}

22 May

It definitely feels like summer is on the way this week! The number of meals eaten outside is steadily increasing, summer hours were just announced at work {woo hoo!}, Memorial Day is just around the corner, and our neighbors gathered last weekend for the annual neighborhood block party! One of my favorite flavors of summer has to be fresh strawberries, so I decided on the occasion of the block party, I would try out a new recipe for strawberry cupcakes!

Based on my house number and the rules of the potluck, I was really supposed to be making a side dish {which I did – Beer Baked White Beans}; but, as you know, it’s pretty hard for me to resist an opportunity to do some baking! I went to one of the most reliable sources I know to find a new recipe – Martha Stewart. The recipe I found is for Sprinkles’ Strawberry Cupcakes, and I am so happy with how these came out. They are a perfect consistency and so delightfully fresh and summery. Here is the original recipe as I made it.

{Sprinkles’ Strawberry Cupcakes}

source: Martha Stewart – makes about 40 mini cupcakes

  • 2/3 cup whole fresh or frozen strawberries, thawed
  • 1 1/2 cups all-purpose flour, sifted
  • 1 teaspoon baking powder
  • 1/4 teaspoon coarse salt
  • 1/4 cup whole milk, room temperature
  • 1 teaspoon pure vanilla extract
  • 1/2 cup (1 stick) unsalted butter, room temperature
  • 1 cup sugar
  • 1 large egg, room temperature
  • 2 large egg whites, room temperature

Fresh strawberry puree … yum!

Preheat oven to 350 degrees. Line a muffin tin with cupcake liners; set aside. Place strawberries in a small food processor; process until pureed. You should have about 1/3 cup of puree, add a few more strawberries if necessary or save any extra puree for frosting; set aside. In a medium bowl, whisk together flour, baking powder, and salt; set aside. In a small bowl, mix together milk, vanilla, and strawberry puree; set aside.
In the bowl of an electric mixer fitted with the paddle attachment, cream butter on medium-high speed, until light and fluffy. Gradually add sugar and continue to beat until well combined and fluffy. Reduce the mixer speed to medium and slowly add egg and egg whites until just blended. With the mixer on low, slowly add half the flour mixture; mix until just blended. Add the milk mixture; mix until just blended. Slowly add remaining flour mixture, scraping down sides of the bowl with a spatula, as necessary, until just blended.
Divide batter evenly among prepared muffin cups. Transfer muffin tin to oven and bake until tops are just dry to the touch, 22 to 25 minutes {10-12 minutes for mini cupcakes}. Transfer muffin tin to a wire rack and let cupcakes cool completely in tin before icing.

 {Sprinkles’ Strawberry Frosting}
source: Martha Stewart – more than enough to frost 40 mini cupcakes
  • 3 tablespoons fresh strawberry puree {left over from cupcake batter}
  • 1 cup (2 sticks) unsalted butter, firm and slightly cold
  • Pinch of coarse salt
  • 3 1/2 cups confectioners’ sugar, sifted
  • 1/2 teaspoon pure vanilla extract
In the bowl of an electric mixer fitted with the paddle attachment, beat together butter and salt on medium speed until light and fluffy. Reduce mixer speed and slowly add confectioners’ sugar; beat until well combined. Add vanilla and 3 tablespoons strawberry puree; mix until just blended. Do not overmix or frosting will incorporate too much air. Frosting consistency should be dense and creamy, like ice cream.
If you’re using a pastry bag to frost your cupcakes, here’s a tip that may be common sense to everyone else, but that I found very helpful! Place the tip of your bag at the bottom of a tall glass and fold the excess over the sides, like so:
Now you have a stable base to scoop all of that delicious frosting into your bag using a spatula or spoon, like so:
I hope you will give this recipe a try and enjoy these little cupcakes as much as my neighbors and I did! Happy summer!

New Recipe! {Rose Petal Pound Cake}

17 Apr

The inspiration for this recipe came as I was planning our Storybook Baby Shower. I knew that I wanted to bake something sweet and, for some reason, that bottle of rose water in my kitchen was really speaking to me {hadn’t used it since the Pistachio Cupcakes with Rose Water Buttercream from last summer}.  I was even more determined to figure out some way to use the rose water when we settled on the storybook theme, and I started running through cute menu items that would fit with the theme {Ring around the Rosie. anyone?}. After a bit of googling {or is it google-ing?}, I decided that pound cake was the way to go. The recipe I ended up with was an adaptation of The Pioneer Woman’s Perfect Pound Cake. I simply substituted her lemony flavors with rose water and ginger ale.

I really love the consistency of this cake – it has that firm, yet moist consistency that is so delicious in a pound cake. I also really love the subtle rose flavor that comes through, especially when served with fresh whipped cream flavored with a hint of rose water. Just opening the bottle of rose water smells like summer romance!

I will say, this cake has been trickier to get out of the pan than most, and I would definitely recommend making sure your pan is well-greased. I would also really give it some time to cool in the pan before trying to get it out. Nothing is more defeating after all that time in the kitchen than a bundt cake that doesn’t cleanly come out of the pan {and that definitely happened to me on the first go-round with this one}!

Here is the recipe as I adapted it.  Enjoy!

All ready for the oven!

{Rose Petal Pound Cake}

Adapted from The Pioneer Woman’s Perfect Pound Cake ~ Makes one full-sized bundt

  • 3 sticks Butter
  • 3 cups Sugar
  • 5 whole Eggs
  • 1 tablespoon Rose Water
  • 3 cups All-purpose Flour
  • 1 cup Ginger Ale

Preheat oven to 325 degrees.

Cream butter. Add sugar, 1 cup at a time, mixing after each addition. Add eggs, 1 at a time, mixing after each addition. Add rose water and mix well. Add flour, 1 cup at a time, mixing well after each addition. Add soft drink, then mix together until combined. Scrape sides of bowl, then mix briefly.

Pour into a greased Bundt pan and bake for 1 hour to 1 hour 10 minutes, until the cake is no longer jiggly and a toothpick comes out clean.

Remove cake from oven and let cool in the pan for 10-15 minutes. Gently shake the pan until the edges feel completely loosened from the sides of the pan.  Run a knife between the pan and the cake to free any stubborn spots. Invert on a cooling rack and allow to cool completely.

Serve with rose water whipped cream {about 1/2 cup heavy whipping cream, whipped with a splash of rose water and sugar to taste}.

I wish I could make a whole cake of just these crunchy bits on the bottom ... yum!


Storybook Baby Shower – Part 2 {The Menu}

19 Mar

In case you missed my last post, I recently co-hosted a storybook-themed baby shower for a dear friend. Last time, I told you a little bit about the invitations we sent to set our storybook scene.

A lot of my inspiration came from this darling baby shower featured on Martha Stewart. After looking through her pictures, I decided that another fun way to weave in the storybook theme would be through cute, children’s book-themed menu items. I tried to fight the temptation to let this drive the menu too much, so that we would still end up with a balanced and appetizing spread. Here’s what we settled on:

  • The Little Quiches that Could {Vegetarian Mini-Quiches}
  • Peter Cottontail Pastry Puffs {Savory Mini-Choux Puffs}
  • Mad Hatter’s Tea Sandwiches {Salmon and Cucumber Sandwiches}
  • Jack Jump over the Carrot Sticks {Vegetable Platter}
  • Green Eggs and “Ham” {Avocado Deviled Eggs with Turkey Bacon}
  • If You Give a Mouse a Cookie {Lemon Blossoms}
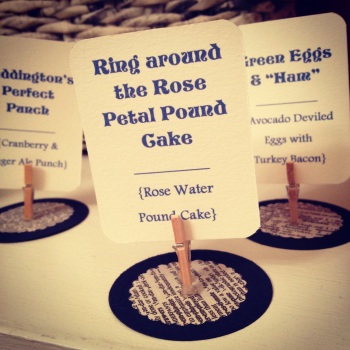
  • Ring around the Rose Petal Pound Cake {stay tuned for this recipe in a later post!}
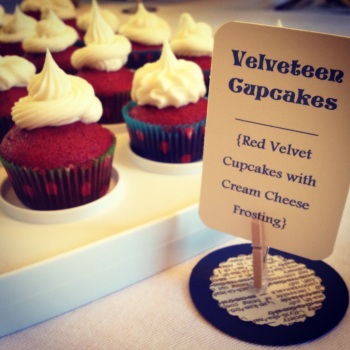
  • Velveteen Cupcakes {Red Velvet Cupcakes with Cream Cheese Frosting}
  • Hush-a-Bye Bellinis {Prosecco with Peach Puree}
  • Paddington’s Perfect Punch {Cranberry Juice and Ginger Ale}

Of course, another reason I was excited to have a themed menu was that it meant making menu cards! The beauty of these little cards is that they were made using only items already on hand: scrap paper for the dark blue circle bases, pages from an old dictionary headed for the recycle bin, mini-clothes pins left over from a wedding project, and one sheet of cream paper left over from the invitations. They came together using a circle punch, scalloped circle punch, and glue dots! I realize not everyone has mini-clothes pins on hand, but the point is, it’s fun to see what you can do using just the things you have around the house!

Next time I’ll wrap up this little series with some pictures of the finishing touches that brought it all together. Enjoy!

Get your chocolate fix! {Triple Chocolate Cookies}

22 Jan

So, happy New Year, everyone!  I hope you all had a wonderful holiday season, and that you’re excited for what’s ahead in 2012!  If one of your resolutions happens to be to eat more rich chocolate, then you’re in luck! I found this recipe for triple chocolate cookies over at Brown Eyed Baker and thought they looked too delicious to pass up. As you may know, I have a pretty serious chocolate-lover in the house, and I thought these might satisfy even his cravings!

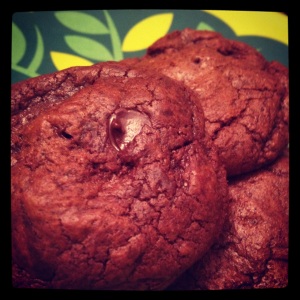
Chewy, rich, and oh so chocolate-y!

As I was chopping 16 ounces of chocolate, I thought it might just be overkill {not to mention the entire bag of chocolate chips and 1/2 cup of cocoa powder!}, but the finished cookies were melt-in-your-mouth delicious and will definitely satisfy even the most intense chocolate cravings.  Just be warned … they’re super rich and beyond chocolate-y. The sweet aroma was even enough to make my neighbor on the plane the next day reconsider his original decision to turn down my cookie offer. The next time he saw my carry-on make an appearance, he said, “I’ll actually take a couple of cookies if you don’t mind.  They just smelled too good.” That definitely made me smile!

Here’s Brown Eyed Baker’s recipe – it was easy to follow and I made no real changes.

{Triple Chocolate Cookies}

makes about 42 cookies

  • 2 cups (10 ounces) all-purpose flour
  • ½ cup (1½ ounces) Dutch-processed cocoa powder
  • 2 teaspoons baking powder
  • ½ teaspoon salt
  • 16 ounces semisweet chocolate, chopped
  • 4 large eggs
  • 2 teaspoons vanilla extract
  • 2 teaspoons instant coffee or espresso powder
  • 10 tablespoons (1¼ sticks) unsalted butter, softened but still cool
  • 1½ cups packed (10½ ounces) light brown sugar
  • ½ cup (3½ ounces) granulated sugar
  • 12 ounces (about 2 cups) semisweet chocolate chips

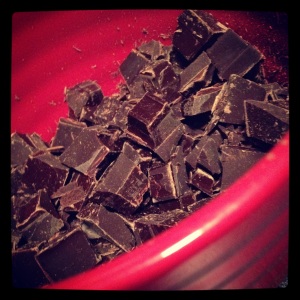
So much chocolate!

Sift together the flour, cocoa, baking powder, and salt in a medium bowl; set aside.

Melt the chocolate in a medium heatproof bowl set over a pan of almost-simmering water, stirring once or twice, until smooth; remove from the heat. {I melted mine at 50% power in 30 second increments in the microwave.} In a small bowl, beat the eggs and vanilla lightly with a fork, sprinkle the coffee powder over to dissolve, and set aside.

Either by hand or with an electric mixer, beat the butter at medium speed until smooth and creamy, about 5 seconds. Beat in the sugars until combined, about 45 seconds; the mixture will look granular. Reduce the speed to low and gradually beat in the egg mixture until incorporated, about 45 seconds. Add the chocolate in a steady stream and beat until combined, about 40 seconds. Scrape the bottom and sides of the bowl with a rubber spatula. With the mixer at low speed, add the dry ingredients and mix until just combined. Do not over-beat. Fold in the chocolate chips. Cover with plastic wrap and let stand at room temperature until the consistency is scoopable and fudge-like, about 30 minutes.

Meanwhile, adjust the oven racks to the upper- and lower-middle positions and heat the oven to 350 degrees. Line 2 baking sheets with parchment paper {I used my new silicone baking mat and the cookies slid off like a dream – thanks, Amy!}. Scoop the dough onto the prepared baking sheets with a 1¾-inch ice cream scoop, spacing the mounds of dough about 1½ inches apart.

Ready to bake {thanks for the Silpat, Amy!}

Bake until the edges of the cookies have just begun to set but the centers are still very soft, about 10 minutes, rotating the baking sheets front to back and top to bottom halfway through the baking time. Cool the cookies on the sheets about 10 minutes, slide the parchment with cookies onto wire racks, and cool to room temperature. Cover one cooled baking sheet with a new piece of parchment paper. Scoop the remaining dough onto the parchment-lined sheet, bake, and cool as directed. Remove cooled cookies from the parchment with a wide metal spatula.

Enjoy!

More Holiday Baking! {Chai Spice Cookies}

19 Dec

At this point in the year, I think everyone is already a little overloaded on sugar. There are tasty treats everywhere you turn, and it’s really hard not to indulge and just give the “oh well, it’s the holidays” excuse! That being said, I decided to contribute to the sugar rush by baking chai spice cookies for a co-worker’s birthday.

The recipe is from Better Homes and Gardens, and while I found these cookies a little on the annoying side to make, the payoff in the end was certainly worth it. One of my co-workers described them as being like that last bite of pumpkin pie where you get crust with some of the filling still on it – crisp and buttery with all of those warm spice flavors.  I think that sums it up pretty well, so if that description has your mouth watering; these cookies are for you!

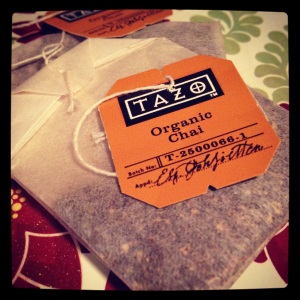
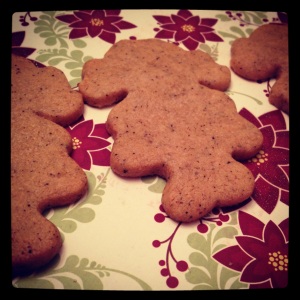
Perfect afternoon snack - chai tea with chai spice cookie {how very meta}

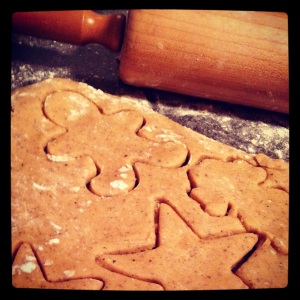
I guess I’ve grown pretty accustomed to making cookies that you can simply roll into balls by hand, so the concept of constantly flouring every surface and rolling out extremely sticky dough seemed a bit much {or maybe I just need some practice!}. Once I was over this initial frustration, I was able to appreciate how adorable little chai spice boys and girls can be!

Here’s the recipe as it reads on BHG with my only change being to roll the dough out a little thinner {yielding close to twice as many cookies as the recipe indicates with a little crispier consistency}. I also opted not to decorate mine with powdered sugar icing.

{Chai Spice Cookies}

  • 2 spiced chai-flavored tea bags
  • 3 cups all-purpose flour
  • 2 teaspoons pumpkin pie spice
  • 1 1/2 cups butter, softened
  • 1 cup granulated sugar
  • 2 egg yolks
  • 2 tablespoons molasses

Remove tea bag contents (3 teaspoons); discard bags. In medium bowl combine tea, flour, and pumpkin pie spice; set aside.

In large mixing bowl beat butter on medium to high 30 seconds. Add sugar; beat until light and fluffy. Beat in egg yolks and molasses. Beat in as much of the flour mixture as you can; stir in remaining flour. Divide dough in half. Cover and refrigerate about 3 hours or until easy to handle.

Preheat oven to 350 degrees F. Grease cookie sheets or line with parchment paper. On lightly floured surface, roll half of the dough at a time until 1/4-inch thickness {mine was more like 1/8-inch thickness}. Cut dough with 4-inch gingerbread girl cutters {or whatever shapes you want!}.

Bake 12 minutes or until edges are lightly browned. Cool on cookie sheets 2 minutes. Transfer to rack to cool completely. Makes 18 to 20 cookies {I’d say I had closer to 40 cookies when it was all said and done}.

Enjoy!